Thursday, July 18, 2013
Progress
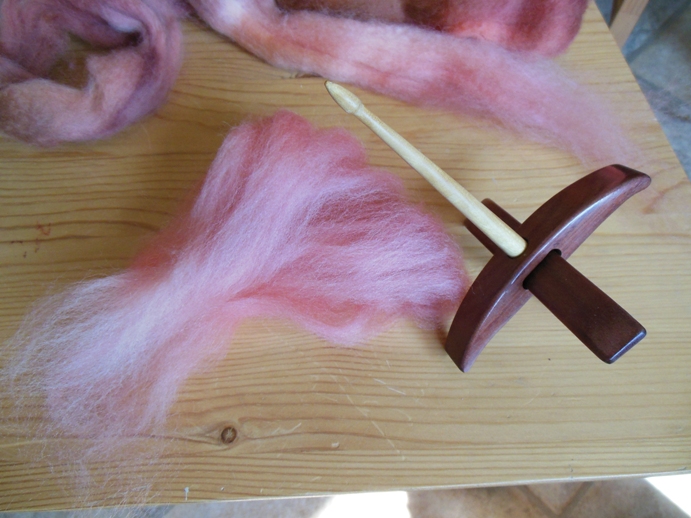
Progress continues on the Lazy Dragon. The first quarter is spun and knit. The second quarter is spun and being knit (top photo). The remaining half is being spun (second photo).
Progress has also begun on my Tread Softly shawl. Yes, after all this time I pulled it out of storage. I prepared my start for the knit on edging. Cut my working yarn from the main body... and then realized I still had 2 more rounds to knit!
Took a deep breath. Picked up the working yarn. Proceeded to add those two rounds.
NOW I'm ready to work the knit on edging and only a couple of extra ends to weave in later...
Yep, that's how it looks right now. ;)
I'm saving better photos for the final reveal.
And to illustrate that I'm not simply starting new projects...
...there is a completed baby blanket (washed and blocked) as well as a wee baby hat (modeled on a doll).
Friday, July 5, 2013
Lazy Dragon begins
Two spinning projects on the go evidently wasn't enough for me because I had to start a third. (There's a fourth hibernating.) I'm spinning up this peachy coloured BFL from On The Round on Etsy (in my stash for a little while) to make a new design that won't leave my head. It's a Lazy Dragon shawl intended to make maximum use of a braid of fibre. However, being a lazy dragon, it must take minimal effort (for a spinning knitter).
Here is how I've begun.
Step 1) photograph roving braid with a dragon. (non-essential step; potentially too much extra work for a lazy dragon)
Step 2) unbraid the roving until you have a crazy long length that requires you to stand on a chair as it drapes over your neck.
Step 3) find the mid point of the roving and pull apart into 2 still-long lengths
Last step could be avoided with two braids for a larger project.
Step 4) Split one of the halves length-wise and try to make those halves equal.
I chose to split the darker half for the bottom of my shawl (where the design begins).
Step 5) grab the end and pull off a small chunk. Fluff it width-wise and prepare to spin it from the fold to maximize fluffiness of the yarn.
Step 6) Start spinning from the fold. I'm going for a singles sport weight, so I started with a sport yarn leader. This project will be knit from the singles, so I'm making sure the yarn will hold up. Now is definitely not the time to have light twist, but neither to I want to over twist it and lose the fluffiness. That's why I chose BFL - it doesn't need a gross amount of twist to hold together.
Started spinning on July 1. Finished the first oz of singles the next day. My fastest yet.
Step 7) (again, optional) photograph finished 'turtle' of yarn
Having completed the first section of yarn, it's time to start knitting. After swatching on different yarn, I went back to a familiar stitch that does wonderful things to handspun singles and provides glorious texture and depth to a knit project.
Step 8) Start knitting from the Turkish ball of yarn. This is an essential step. There's no rewinding for a Lazy Dragon. No skeining or setting the twist. You must knit straight from the spun ball. If you spin with a different tool, I suppose you may have to rewind it. Or go get a turkish spindle.
| Showing off the gradient |
| with a dragom |
Step 1) photograph roving braid with a dragon. (non-essential step; potentially too much extra work for a lazy dragon)
Step 2) unbraid the roving until you have a crazy long length that requires you to stand on a chair as it drapes over your neck.
Step 3) find the mid point of the roving and pull apart into 2 still-long lengths
Last step could be avoided with two braids for a larger project.
| One half with the darker end and pinky middle |
| Second half with the yellowish end and pinky middle |
I chose to split the darker half for the bottom of my shawl (where the design begins).
| roughly equal length-wise halves |
| Fluffy tuft |
| Fluffy tuft folded in half and waiting to be spun. I later made smaller tufts by pinching from the tip. Those were easier to work with. |
| Spinning on a medium sized Turkish spindle from Thomas Creations/ThreadsThruTime |
Step 7) (again, optional) photograph finished 'turtle' of yarn
| Pretty ounce of yarn on the spindle |
| underside of the yarn to see colours |
| some Thomas Creations / TTT spindle pron |
Having completed the first section of yarn, it's time to start knitting. After swatching on different yarn, I went back to a familiar stitch that does wonderful things to handspun singles and provides glorious texture and depth to a knit project.
Step 8) Start knitting from the Turkish ball of yarn. This is an essential step. There's no rewinding for a Lazy Dragon. No skeining or setting the twist. You must knit straight from the spun ball. If you spin with a different tool, I suppose you may have to rewind it. Or go get a turkish spindle.
| underside of knitting to keep some things secret! |
Tuesday, July 2, 2013
Spinning Diverse Fibres
I suppose it's official now. I'm a spinning fanatic.
In case my (non-fibre-y) friends and family didn't already think me strange enough, I started spinning my dog's fur.
Having completed 2/3 of my camel silk (above- isn't that lovely stuff?), I decided my support spindle needed a break from all that fine lace and the bag of dog hair stashed under the sink needed a reason-to-be.
With the help of a leader yarn (my first time using/needing one; I usually hand twist the start of a yarn) I started spinning Darla's fur. This is all undercoat tufts that I pluck from her, so there is very minimal tough guard hairs in the blend.

I have no brushes/carders to process the fibre, so I'm spinning from the cloud/fluff. The staple length is quite short (especially compared with the BFL I started spinning yesterday), but the high speed of the spindle and the lack of any weight pulling down is working to whip this up. Because of the leader yarn I started with, the single is being S-spun. I'm keeping the yarn relatively fine at about a sport weight single - which is 'thick' for me. I'll be 2-plying this dog yarn and then knitting up a wee doggy. It's essentially 'art yarn' to me. Too itchy/fluffy/sheddy and too warm to be of any practical use. One day I might consider blending it with wool, but this first play with dog yarn - chiengora - is just for fun.
In case my (non-fibre-y) friends and family didn't already think me strange enough, I started spinning my dog's fur.
Having completed 2/3 of my camel silk (above- isn't that lovely stuff?), I decided my support spindle needed a break from all that fine lace and the bag of dog hair stashed under the sink needed a reason-to-be.
With the help of a leader yarn (my first time using/needing one; I usually hand twist the start of a yarn) I started spinning Darla's fur. This is all undercoat tufts that I pluck from her, so there is very minimal tough guard hairs in the blend.
I have no brushes/carders to process the fibre, so I'm spinning from the cloud/fluff. The staple length is quite short (especially compared with the BFL I started spinning yesterday), but the high speed of the spindle and the lack of any weight pulling down is working to whip this up. Because of the leader yarn I started with, the single is being S-spun. I'm keeping the yarn relatively fine at about a sport weight single - which is 'thick' for me. I'll be 2-plying this dog yarn and then knitting up a wee doggy. It's essentially 'art yarn' to me. Too itchy/fluffy/sheddy and too warm to be of any practical use. One day I might consider blending it with wool, but this first play with dog yarn - chiengora - is just for fun.
Wednesday, June 26, 2013
Sabbatical was not very restful
Dear, dear Sabbatical cardi.
How much grief you have/are causing me.
Firstly, who thought it was a good idea (ME) to work the body as one piece? Oh, sure, shaping was easy enough with stitch markers in place, but blocking out that lace now is a PITA.
Secondly, what is going on with those ridiculously large armpits?? I swear I did all the calculations correctly based on my gauge swatch. And might I add that I am very unimpressed that I've had to do so much math after paying for a pattern. I mean, really, what am I paying for if I have to calculate everything again because the pattern says work to X length - but you can't just knit to that length and measure your unblocked work. No, you have to knit taking into account what length it will block to. And since I'm supposed to be getting the same gauge as the designer, how about you just tell me how many times to repeat the pattern rows, what row to decrease on, etc.
Otherwise I may as well grab my own measurements, my own stitch pattern, my own swatch...
(wait, that's what I normally do)
Thirdly, self, why does that sleeve on the right look to have about 2 more stitches in its width? I'm guessing that was the second sleeve and that would explain why you had to reknit the cap twice. Well, partly explains - you should have counted your stitches more regularly.
I'm not sure I can fit those sleeves into those sleeve holes.
I am NOT reknitting any part of the body.
I will pick up stitches and fill in that arm hole with short rows if I have to.
ETA - we'll call that an armpit gusset... yes, yes we will.
I WILL make this cardi work!
Because, damn, it's gorgeous. Or, it will be.
ETA more pics after drying.
Not impressed, but I'm keeping in mind it needs a band along the front yet. Those sides still look thin - and they are definitely width specified in pattern. It's the gaping pits I seem to have messed up.
ETA - I strongly suspect I forgot to consider swatched size when measuring those armpits while knitting... that would be the result of putting the project down for a year and picking back up, ripping back to start of armhole shaping, and knitting with infant twins...
So do I frog again??
*sigh*
I suspect that yes, yes I do.
WHAAAAAAAAAAAA
(I may start another sweater in the meantime. Something simpler.)
How much grief you have/are causing me.
Firstly, who thought it was a good idea (ME) to work the body as one piece? Oh, sure, shaping was easy enough with stitch markers in place, but blocking out that lace now is a PITA.
Secondly, what is going on with those ridiculously large armpits?? I swear I did all the calculations correctly based on my gauge swatch. And might I add that I am very unimpressed that I've had to do so much math after paying for a pattern. I mean, really, what am I paying for if I have to calculate everything again because the pattern says work to X length - but you can't just knit to that length and measure your unblocked work. No, you have to knit taking into account what length it will block to. And since I'm supposed to be getting the same gauge as the designer, how about you just tell me how many times to repeat the pattern rows, what row to decrease on, etc.
Otherwise I may as well grab my own measurements, my own stitch pattern, my own swatch...
(wait, that's what I normally do)
Thirdly, self, why does that sleeve on the right look to have about 2 more stitches in its width? I'm guessing that was the second sleeve and that would explain why you had to reknit the cap twice. Well, partly explains - you should have counted your stitches more regularly.
I'm not sure I can fit those sleeves into those sleeve holes.
I am NOT reknitting any part of the body.
I will pick up stitches and fill in that arm hole with short rows if I have to.
ETA - we'll call that an armpit gusset... yes, yes we will.
I WILL make this cardi work!
Because, damn, it's gorgeous. Or, it will be.
ETA more pics after drying.
Not impressed, but I'm keeping in mind it needs a band along the front yet. Those sides still look thin - and they are definitely width specified in pattern. It's the gaping pits I seem to have messed up.
ETA - I strongly suspect I forgot to consider swatched size when measuring those armpits while knitting... that would be the result of putting the project down for a year and picking back up, ripping back to start of armhole shaping, and knitting with infant twins...
So do I frog again??
*sigh*
I suspect that yes, yes I do.
WHAAAAAAAAAAAA
(I may start another sweater in the meantime. Something simpler.)
Monday, June 24, 2013
Bobble Love
![]() |
| Bobble Love |
I appreciate the squish-factor of garter.
But I find it very boring.
So when I have to work in garter, I do like to spice it up a little.
With my current project I decided some bobble hearts were in order. Cute, non?
If you'd like to add some bobble-love to your next garter project here's what you need to know:
1) How to make a bobble - K into the front, back, and front again of 1 stitch. Turn and purl those stitches. Turn and knit all 3 tog.
2) Where you want to start the bottom of your heart - assuming you're working from the bottom-up.
Once you know those 2 things, proceed as follows:
1)On the right side, knit to the heart point, make a bobble, continue knitting across.
2)On the reverse side, knit to the bobble stitch and purl it, continue working across.
3) Knit to one stitch before previous bobble, Bobble, Knit 1, Bobble, knit across.
4) Knit to bobble, purl 3, knit remainder
5) Knit to one stitch before previous bobble, Bobble, Knit 3, Bobble, knit across.
6) Knit to bobble, purl 5, knit remainder
7) Knit to one stitch before previous bobble, Bobble, Knit 5, Bobble, knit across.
8) Knit to bobble, purl 7, knit remainder
9) Knit to one stitch before previous bobble, Bobble, Knit 7, Bobble, knit across.
10) Knit to bobble, purl 9, knit remainder
11) Knit to one stitch before previous bobble, Bobble, Knit 9, Bobble, knit across.
12) Knit to bobble, purl 11, knit remainder
13) Knit to above previous bobble, Bobble, Knit 9, Bobble, knit across.
14) Knit to bobble, purl 11, knit remainder
15) Knit to above previous bobble, Bobble, Knit 4, Bobble, Knit 4, Bobble, knit across.
16) Knit to bobble, K1, P4, K1, P4, knit remainder
17) Knit to 1 stitch after previous bobble, Bobble, Knit 2, Bobble, Knit 3, Bobble, Knit 2, Bobble, knit across
18) Knit to bobble, k1, P2, K5, P2, knit remainder
19) Knit to 1 stitch after previous bobble, Bobble, Bobble, K5, Bobble, Bobble, knit across.
Continue working in garter.
It's simpler to do than to type. Maybe a chart would be helpful. It's also helpful if you are working from the top down, since I am not typing out additional instructions.
There you go. Hope that helps liven up a garter project for you. And if you want to see how the reverse looks:
A little blocking along the length will fix up those wavy garter lines.
Saturday, June 22, 2013
can't show you
June is almost over.
All I can say of my fibre-activities is
1) I didn't love the mystery pattern and the yarn I was working with together. Going to save that yarn for a mystery CAL in August and try again with the shawl at a later time.
2) I'm working on far too many baby blankets and since they're all surprise gifts I can't show them online. Yet. Sorry. I know you're very disappointed.
3) I have several design ideas I'd much rather be working on. But darn those baby blankets...
4) I've been working on my Sabbatical cardi and I was half done the second sleeve when I had to rip back a few rounds. Still rebuilding, but the end is nearing!
5) Spinning on the second third of the fuschia dance is progressing well. Almost done that section.
All I can say of my fibre-activities is
1) I didn't love the mystery pattern and the yarn I was working with together. Going to save that yarn for a mystery CAL in August and try again with the shawl at a later time.
2) I'm working on far too many baby blankets and since they're all surprise gifts I can't show them online. Yet. Sorry. I know you're very disappointed.
3) I have several design ideas I'd much rather be working on. But darn those baby blankets...
4) I've been working on my Sabbatical cardi and I was half done the second sleeve when I had to rip back a few rounds. Still rebuilding, but the end is nearing!
5) Spinning on the second third of the fuschia dance is progressing well. Almost done that section.
Thursday, May 30, 2013
Summer Mystery Shawl
Is it June yet? Is it?
Perhaps I should also be asking if my printer works now - magically on its own...
I'll cross that bridge later.
For now I'm looking forward to starting a new mystery shawl KAL hosted by Wendy Johnson.
My previous summer mystery shawl was gifted to my lovely midwife on her birthday.
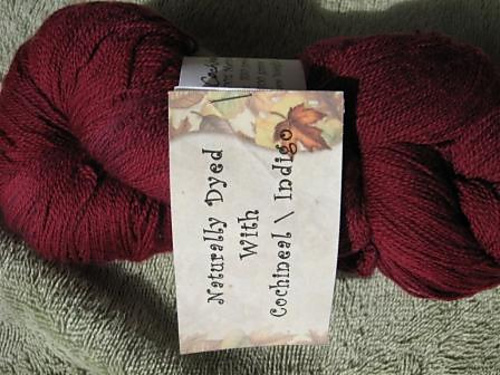
This time I'll be working up a large shawl with my merino lace from Painted Fleece hand-dyed with cochineal and indigo.
Going down in needle size for the lace. I think it's a 3.5mm. Looks like my smallest KP interchangeable. Can't find most of my needles, which I usually use for comparison purposes having broken (and tossed) my needle size gauge. I should really replace that. And find my needles...
Perhaps I should also be asking if my printer works now - magically on its own...
I'll cross that bridge later.
For now I'm looking forward to starting a new mystery shawl KAL hosted by Wendy Johnson.
My previous summer mystery shawl was gifted to my lovely midwife on her birthday.
This time I'll be working up a large shawl with my merino lace from Painted Fleece hand-dyed with cochineal and indigo.
Going down in needle size for the lace. I think it's a 3.5mm. Looks like my smallest KP interchangeable. Can't find most of my needles, which I usually use for comparison purposes having broken (and tossed) my needle size gauge. I should really replace that. And find my needles...
Subscribe to:
Posts (Atom)
.jpg)
+-+Copy.jpg)


.jpg)
.jpg)

.jpg)